To optimize Windows 10 for gaming, create a restore point, set your monitor to its highest refresh rate, disable background and startup apps, debloat with Winhance, enable the Ultimate Performance power plan, unpark CPU cores with QuickCPU, and set your GPU control panel to prefer maximum performance with V-Sync off. These changes free up CPU, GPU, and RAM that Windows would otherwise spend on features you don’t need while gaming.
Applies to: Windows 10 (22H2) | Last updated: April 21, 2026
Key Takeaways
- Most performance wins on Windows 10 come from stopping work the system doesn’t need to do — background apps, telemetry, bloat, visual effects — not from overclocking.
- Winhance handles the debloat, telemetry, and service cleanup in one tool with a proper undo script (export before apply).
- The Ultimate Performance power plan and QuickCPU together stop Windows from parking CPU cores, which is the biggest single FPS improvement on most systems.
- In the NVIDIA Control Panel, set Low Latency Mode to Ultra, Power Management to Prefer maximum performance, and disable V-Sync for competitive games.
- A system restore point gives you a one-click rollback if any tweak causes issues — always create one before touching power, driver, or registry settings.
Quick Steps
- Create a restore point (search restore > Create a restore point > Create).
- Set the monitor to its highest refresh rate (Settings > System > Display > Advanced display settings).
- Turn off notifications, background apps, and startup apps (Settings > Privacy and Settings > Apps).
- Run Winhance to debloat, disable telemetry, and remove OneDrive + Edge.
- Enable the Ultimate Performance power plan.
- Run QuickCPU once to unpark every CPU core.
- Set visual effects to Adjust for best performance, then re-enable Smooth edges of screen fonts.
- Disable network adapter power saving (Device Manager > Network adapters > Properties).
- Tune the NVIDIA Control Panel for latency and performance.
Create a Restore Point Before You Start
Every step in this guide is reversible, but a restore point turns “undo 20 settings manually” into a single click. In my computer repair shop I never ran a tweak pass without one — the five minutes it takes saves hours when something goes sideways.
- Search for restore in the Start menu and open Create a restore point.
- Select your C: drive and click Configure.
- Choose Turn on system protection and allocate about 5 GB of disk space.
- Click Apply, then Create, name it Before gaming tweaks, and click Create.
Lock in the Right Display and Desktop Settings
Windows defaults your monitor’s refresh rate to 60 Hz even if the panel is 144 Hz or higher. This is one of the most common setups I see people miss — you paid for the higher refresh rate but Windows isn’t using it.
- Right-click the desktop > Display settings > Advanced display settings.
- Under Refresh rate, pick the highest value listed. Repeat for every monitor.
While you’re in Settings, clean up the taskbar and Start menu. Right-click the taskbar and change the search to Search icon only, hide the Task View button, hide the Meet Now icon, and unpin News and Interests. Unpin any tiles you don’t use from the Start menu. Less visual clutter means less drawing work for Explorer.
Turn Off Notifications, Focus Assist, and Storage Sense
Notifications pop over fullscreen games and break immersion, and more importantly they cost a GPU frame every time they animate. Open Settings > System > Notifications & actions and turn the master slider off. Under Focus assist, set the default to Alarms only and set the “when I’m playing a game” automatic rule to the same.
Next, Settings > System > Storage > Configure Storage Sense or run it now. Enable Storage Sense, set it to run weekly, tick Delete temporary files my apps aren’t using, and set Recycle Bin cleanup to 14 days. This prevents temp file buildup from eating free space over time.
On low-end systems only, swap the desktop wallpaper for a solid black background (Settings > Personalization > Background > Solid color). A static color draws almost no resources compared to a large picture.
Disable Startup and Background Apps
Every app that launches at startup or runs in the background holds memory and eats CPU cycles you could be spending on the game.
- Settings > Apps > Startup — turn off everything except what you actually need at boot (antivirus, audio drivers).
- Settings > Privacy > Background apps — toggle Let apps run in the background off. Store apps still open normally when you launch them; they just can’t run without you.

While you’re in Settings, run through these pages quickly and disable anything you don’t use:
- Settings > Privacy > General — all four sliders off.
- Settings > Privacy > Diagnostics & feedback — Required diagnostic data, feedback frequency Never.
- Settings > Privacy > Activity history — uncheck both boxes and clear the history.
- Settings > Update & Security > Delivery Optimization — turn off Allow downloads from other PCs.
- Settings > Accounts > Sign-in options — disable Use my sign-in info to automatically finish setting up.
If you’re currently signed in with a Microsoft Account, switch to a local account (Settings > Accounts > Sign in with a local account instead). Local accounts skip the OneDrive nagging, Microsoft 365 sync, and the occasional push notification for Microsoft services.
Debloat Windows 10 with Winhance
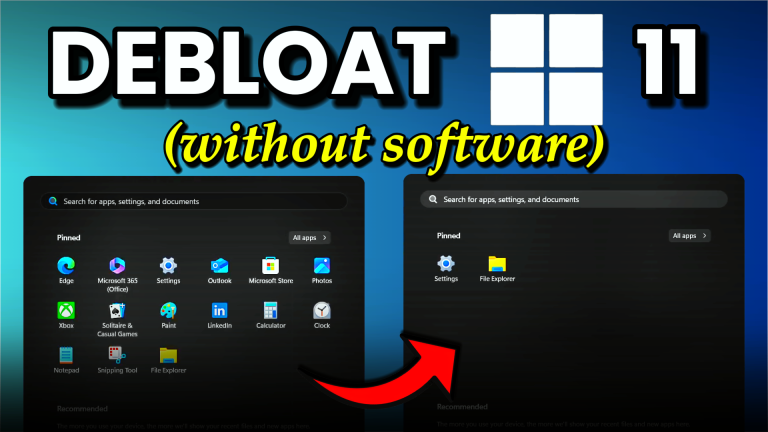
This is the biggest single-step improvement on a fresh Windows 10 install. I built Winhance after using several other debloat utilities in the shop — it handles Edge removal, OneDrive removal, telemetry services, scheduled tasks, and bloatware in one tool with proper undo scripts.
Tip: Before you start, use Winhance’s Export settings option to save a restore file. If anything misbehaves later you can re-import it and undo every change.
- Download Winhance from winhance.net and run it as admin.
- In the Customize tab, apply the default Windows 10 profile: disable telemetry, remove OneDrive, remove Edge, kill Cortana, disable the Xbox Game Bar, and disable mouse acceleration.
- Switch to the Optimize tab and enable the Ultimate Performance power plan, disable unneeded services, and apply visual effect tweaks.
- Open Software > Windows Apps and uninstall Microsoft Store apps you never use (keep Calendar, Photos, and Calculator — removing them breaks other Windows features).
If you prefer a different debloat approach, the Chris Titus Tech Windows Utility covers similar ground via PowerShell. Either tool gets you most of the way — Winhance just bundles the whole flow into one UI.

Set Visual Effects for Performance
The animation and transparency effects in Windows 10 cost GPU cycles even when a game is fullscreen. Disabling them drops the idle GPU load — small but consistent.
- Open File Explorer, right-click This PC > Properties > Advanced system settings.
- Under Performance, click Settings.
- Select Adjust for best performance.
- Re-tick Smooth edges of screen fonts only — everything else off.
Stop the Network Adapter From Sleeping
Windows aggressively power-saves network adapters, which causes millisecond-scale latency spikes every time the adapter wakes. For competitive multiplayer games, these spikes are the difference between getting the first shot and dying.
- Right-click the Start menu > Device Manager.
- Expand Network adapters, right-click your Ethernet or Wi-Fi adapter > Properties.
- On the Advanced tab, set any Power Saving Mode or Energy Efficient Ethernet entry to Disabled.
- On the Power Management tab, untick Allow the computer to turn off this device to save power.
Enable the Ultimate Performance Power Plan and Unpark CPU Cores
Windows 10 parks CPU cores by default when the system is idle to save power. The problem is that “idle” includes the first milliseconds of a game frame — the cores wake up late, causing stutters and lower 1% lows. Unparking forces every core to stay ready.
The Ultimate Performance power plan keeps every core at its minimum clock ceiling and disables most aggressive power-saving paths. If Winhance didn’t enable it during debloat, follow the Ultimate Performance plan guide for the exact powercfg command.
Now pair that with QuickCPU to force every core unparked:
- Download QuickCPU from coderbag.com (64-bit for any CPU from the last decade).
- Run the installer, launch QuickCPU.
- Set System power plan to Ultimate Performance and click Set as active.
- Drag every slider on the right (Core Parking, Frequency Scaling, Performance Boost) all the way to max.
- Click Apply, then OK. The Cores Parked number at the top should read 0.

QuickCPU doesn’t need to run all the time — the settings apply to the power plan. Close it after applying and delete the desktop shortcut.
Tune the NVIDIA Control Panel for Competitive Gaming
The NVIDIA Control Panel defaults to balanced — it trades a few frames per second for quieter fans and lower power draw. For gaming, swap that out for raw performance and minimum latency. You need the current NVIDIA driver installed first — see the NVIDIA driver installation guide if you haven’t done a clean driver install recently.
Right-click the desktop > NVIDIA Control Panel > Manage 3D Settings > Global Settings. Change each setting as follows:
- Low Latency Mode → Ultra — cuts queued frames to 1 for minimum input lag.
- OpenGL rendering GPU → your NVIDIA card (not integrated graphics).
- Power management mode → Prefer maximum performance.
- Preferred refresh rate → Highest available.
- Texture filtering — Quality → High performance.
- Vertical sync → Off. Use in-game V-Sync or G-Sync instead if you need tear-free.
- Threaded optimization → Auto.
- Triple buffering → Off.

Click Apply. For AMD cards, open the AMD Adrenalin software, switch to the Gaming tab, set the global profile to eSports, turn off Radeon Chill, and disable Radeon Anti-Lag+ (keep the standard Anti-Lag on).
Related Optimization Guides
- Winhance — my debloat and optimization utility, Windows 10 and 11.
- Enable the Ultimate Performance power plan via
powercfg. - Install the latest NVIDIA drivers cleanly with DDU.
- Optimize Windows 11 on low-end PCs — same philosophy, Windows 11 specifics.
- Build a custom Windows 10 gaming ISO — skip the tweaks entirely on fresh installs.
Frequently Asked Questions
Why disable background apps in Windows 10?
Every background app holds memory and periodically wakes the CPU for polling and telemetry. On a machine with 8 GB RAM or less the memory savings are noticeable — games with large texture budgets get more headroom before they start paging to disk. On 16 GB+ machines the impact is smaller but you still avoid CPU wake-ups during gameplay that can cause frame-pacing hitches.
What is the best refresh rate for gaming?
144 Hz is the competitive baseline and 240 Hz or higher is the premium tier. Every doubling halves frame time — 60 Hz is 16.7 ms per frame, 144 Hz is 6.9 ms, 240 Hz is 4.2 ms. Lower frame time means less input lag and smoother motion. Make sure Windows is actually using the rate you paid for; the default after a driver install is usually 60 Hz regardless of what the panel supports.
Should I disable Windows updates for better performance?
No — keep security updates on. What causes performance dips is the optional feature updates and the driver updates Microsoft pushes through Windows Update. In Winhance, enable Security updates only, which keeps monthly patches flowing while stopping optional driver pushes and feature releases until you choose to install them.
Does switching to a local account improve gaming performance?
Slightly. Microsoft Account sign-in triggers OneDrive sync, Microsoft 365 auto-setup, and a steady stream of background Microsoft service activity. Switching to a local account eliminates most of that. The FPS gain is usually 1–2% but the reduction in random hitches during gameplay is more noticeable.
What does the Ultimate Performance plan actually change?
It disables the Minimum processor state throttle, forces aggressive parking/unparking, sets PCIe Link State Power Management to off, and keeps the disk from sleeping. The net effect is that your CPU and devices stay at their performance ceiling immediately, rather than waiting a few milliseconds after load. For long all-day gaming sessions you’ll see slightly higher power draw, but the latency reduction is real and measurable with tools like LatencyMon.
Can I undo all these changes?
Yes. Restore the system from the restore point you created at the start, or use Winhance’s Import settings feature to reapply your exported pre-tweak config. NVIDIA Control Panel changes have their own Restore button at the top of the Manage 3D Settings page. QuickCPU settings revert the moment you select a different power plan.