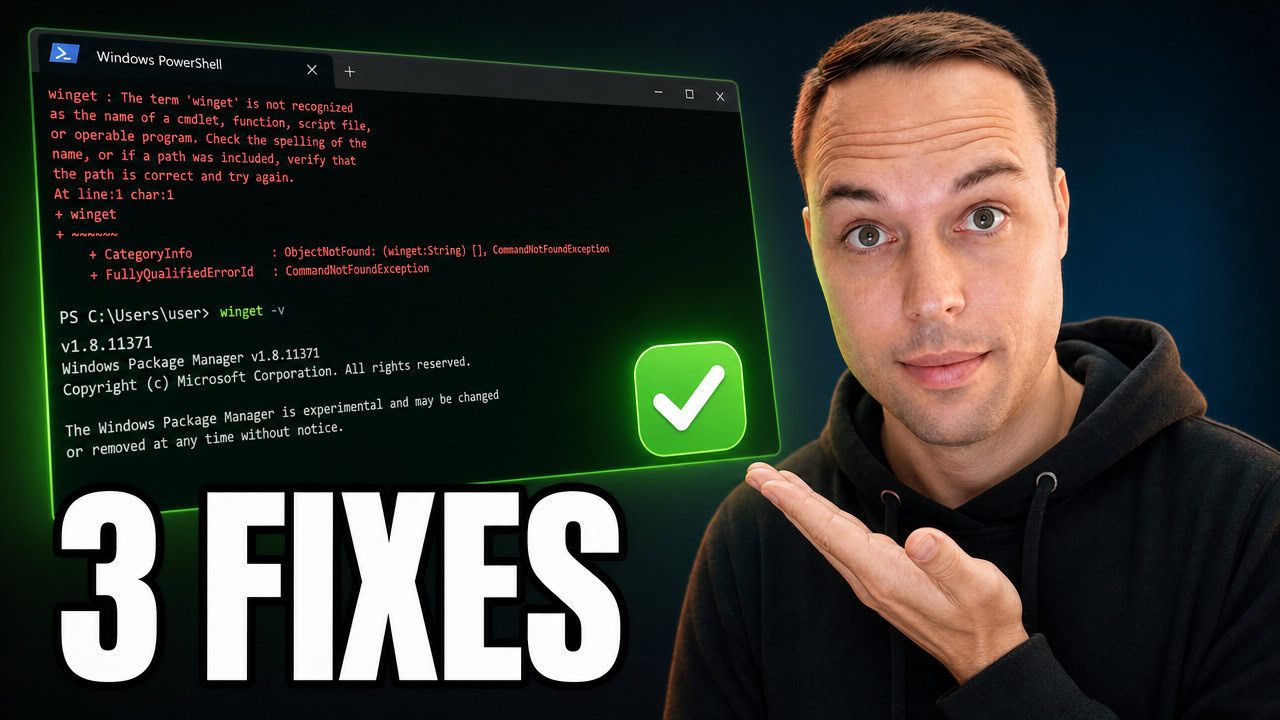
To install or repair WinGet on Windows 10 or Windows 11, the easiest method is to install the App Installer package from the Microsoft Store, which includes WinGet. If the Store is not available, run Microsoft’s PowerShell bootstrap script to install and repair it, or install it manually from the winget-cli GitHub releases. WinGet ships and works on current Windows 11, but Windows 10 does not include a working WinGet by default.
Applies to: Windows 10 (version 1809 and later, including IoT Enterprise LTSC 2021) and Windows 11 (23H2, 24H2, 25H2) | Last updated: June 24, 2026
Key Takeaways
- WinGet (the Windows Package Manager) ships and works out of the box on current Windows 11, but Windows 10 — even Pro editions — does not include a registered, working WinGet by default.
- The simplest method is installing the App Installer from the Microsoft Store, which delivers WinGet. On Windows editions without the Store, you can install the Store from the Microsoft Store web page first.
- Method 2 is a single PowerShell script from Microsoft Learn that installs the
Microsoft.WinGet.Clientmodule and runsRepair-WinGetPackageManager— it both installs and repairs WinGet. - Method 3 is a manual install from the winget-cli GitHub releases using
Add-AppxPackageandAdd-AppxProvisionedPackagewith the license file — the most involved option, for when the others fail. - Verify WinGet with
winget -v. If it returns a version number, WinGet is registered and working.
Quick Steps
- Check whether WinGet already works: open Windows PowerShell and run
winget -v. - Method 1: Install the App Installer from the Microsoft Store — it includes WinGet.
- No Microsoft Store? Download it from the Microsoft Store web page first, then install the App Installer.
- Method 2: Run Microsoft’s PowerShell bootstrap script (installs and repairs WinGet in one go).
- Method 3: Download the dependencies, the msixbundle, and the license file from the winget-cli GitHub release.
- Install the dependencies with
Add-AppxPackage, then the App Installer withAdd-AppxProvisionedPackage. - Confirm it worked with
winget -v.
Why WinGet might be missing or broken
On the latest versions of Windows 11, WinGet is already installed and working — open Windows PowerShell, type the winget command, and it just runs. Windows 10 is different. By default, even the Pro editions do not come with a working WinGet installed, so running the command returns an error that WinGet “is not recognized” because it has not been registered yet.
WinGet is part of the App Installer package, and it is only supported on Windows 10 version 1809 or later. According to Microsoft, WinGet will not be available until you have logged into Windows as a user for the first time, which triggers the Microsoft Store to register the Windows Package Manager as part of an asynchronous process.
WinGet can also become corrupted on both Windows 10 and Windows 11. If your install broke for any reason, the same three methods below will repair it. I recorded the walkthrough on Windows 10 IoT Enterprise LTSC 2021, which has no working WinGet and no Microsoft Store by default — so it is a good worst-case test for every method.
Tip: Check what you have before fixing anything. Open Windows PowerShell and run
winget -v. If you get a version number, WinGet is already working and you do not need any of this.
Method 1: Install WinGet with the App Installer (easiest)
WinGet is delivered by the App Installer, so installing the App Installer is the easiest way to get WinGet on any Windows system. The App Installer is available from the App Installer page on the Microsoft Store. On a normal Windows 10 or 11 install, open that page, click Get or Install, and the App Installer downloads and installs — which also serves as the delivery vehicle for WinGet.
The catch is that this needs the Microsoft Store. On editions without the Store — such as IoT Enterprise LTSC — clicking Install does nothing, because there is no Store to open the link. You need to install the Microsoft Store first.
If you do not have the Microsoft Store
You can download the Microsoft Store from the Microsoft Store web page even when the Store is not installed on your system. On the Store’s web page, click Download to get the Microsoft Store installer, then run that executable. A Microsoft Store window opens, checks system requirements, and downloads the Store onto the system — even on a Windows 10 LTSC version that shipped without it.
This is not the only way to get the Store back. For the full set of options, including offline approaches, see my guide on how to install the missing Microsoft Store on Windows 10 and 11. If your Store is installed but will not launch, my guide on fixing the Microsoft Store when it won’t open covers that instead.
Once the Store is installed, go back to the App Installer page and click Install. It opens the Microsoft Store to the App Installer listing, and clicking Get downloads and installs the App Installer — and with it, WinGet. Give it a moment to finish, then confirm with winget -v in PowerShell. You should see the version number, which means WinGet is up and running. This is by far the easiest method for both installing and repairing WinGet.
Method 2: Install or repair WinGet with PowerShell
The second method is a PowerShell script published on the official Microsoft Learn page for WinGet, under the instructions for installing WinGet in Windows Sandbox. It installs the WinGet PowerShell module and then bootstraps WinGet, so it works to both install and repair the Windows Package Manager.
Right-click the Start button, choose Windows PowerShell (Admin), accept any prompts, then paste the script below and press Enter.
$progressPreference = 'silentlyContinue'
Write-Host "Installing WinGet PowerShell module from PSGallery..."
Install-PackageProvider -Name NuGet -Force | Out-Null
Install-Module -Name Microsoft.WinGet.Client -Force -Repository PSGallery | Out-Null
Write-Host "Using Repair-WinGetPackageManager cmdlet to bootstrap WinGet..."
Repair-WinGetPackageManager -AllUsers
Write-Host "Done."
The script first installs the NuGet package provider, then installs the Microsoft.WinGet.Client module from the PSGallery repository, and finally uses the Repair-WinGetPackageManager cmdlet to register WinGet for all users. The module install can take a minute or two and may look like it is stalling — if it does, press Enter once and it will continue. The blinking cursor means it is still working.
When it finishes, run winget -v to confirm. It returns the installed WinGet version, so the manager is registered and ready. From there you can use WinGet normally — for example, winget search brave. The first time you run a search you will be asked to accept the Microsoft Store source terms; press Y for yes and the results appear.
Method 3: Install WinGet manually from GitHub
The manual method is the most time-consuming and the most complicated, which is why it is last. Use it only if neither of the easier methods worked for you. Everything comes from the winget-cli repository on GitHub — go to the Releases tab and open the latest release.
Scroll to the Assets section at the bottom of the release and download three things: the DesktopAppInstaller_Dependencies.zip file, the Microsoft.DesktopAppInstaller msixbundle file, and the License1.xml license file. Your browser may warn that the desktop app installer could harm your device — that is a false positive, so choose to keep the file.
Step 1: Extract and install the dependencies
Open your Downloads folder, right-click the dependencies zip, and choose Extract All. Inside the extracted folder, open the folder that matches your architecture — almost always x64. To check your architecture, right-click the Start button, click System, and look at the system type (for example, “64-bit operating system, x64-based processor”).
Inside the architecture folder you will find three .appx dependency files. You cannot double-click these to install them, so open Windows PowerShell (Admin) and install each one with the Add-AppxPackage command. To get a file’s full path, select it, hold Shift, right-click, and choose Copy as path, then paste it into the command.
Add-AppxPackage -Path "C:\Users\YourName\Downloads\DesktopAppInstaller_Dependencies\x64\Microsoft.VCLibs.140.00_x64.appx"Run that command once for each of the three .appx files, swapping in each file’s path. A quick way to repeat it: press the Up arrow to recall the previous command, backspace to remove the old path, then Copy as path for the next file and paste it before pressing Enter.
Step 2: Install the App Installer with the license
With the dependencies installed, register the Microsoft Desktop App Installer itself. This command is slightly different because it also needs the license file you downloaded. Use Add-AppxProvisionedPackage, pass the msixbundle to -PackagePath, and pass the XML to -LicensePath (use Copy as path for both).
Add-AppxProvisionedPackage -Online -PackagePath "C:\Users\YourName\Downloads\Microsoft.DesktopAppInstaller_8wekyb3d8bbwe.msixbundle" -LicensePath "C:\Users\YourName\Downloads\e53e159d00e04f729cc2180cffd1c02e_License1.xml"This adds the App Installer for all users on the system, using the official license from the Windows Package Manager repository. Run winget -v afterwards and you will see the version of the package that was just installed, confirming WinGet is now working. It is the longest route, but it is reliable when the Store-based and PowerShell methods are not an option.
After WinGet is working: a GUI and a debloat tool
Once WinGet is installed, you can manage everything from the command line — but you do not have to. If you prefer a graphical interface for searching, installing, and updating apps through WinGet, take a look at UniGetUI, a free package-manager GUI for Windows that sits on top of WinGet and other managers.
WinGet also powers app installs and removals in my own free utility, Winhance, the Windows Enhancement Utility. A working WinGet is what lets Winhance install and reinstall apps cleanly, so getting WinGet sorted first makes the rest of your debloating and setup smoother.
Frequently Asked Questions
Does Windows 10 come with WinGet?
Not in a working state by default. Even Windows 10 Pro does not ship with a registered WinGet, so the winget command returns a “not recognized” error until you install the App Installer. WinGet is supported on Windows 10 version 1809 and later.
How do I check if WinGet is installed?
Open Windows PowerShell and run winget -v. If WinGet is installed and registered, it returns a version number. If you get an error saying the term is not recognized, WinGet is missing and you can use any of the three methods in this guide to install it.
How do I repair a broken WinGet?
The fastest repair is Method 2: run Microsoft’s PowerShell script, which installs the Microsoft.WinGet.Client module and calls Repair-WinGetPackageManager -AllUsers to re-register WinGet. Reinstalling the App Installer from the Microsoft Store (Method 1) also fixes most broken installs.
Can I install WinGet without the Microsoft Store?
Yes. Method 2 (the PowerShell script) and Method 3 (the manual GitHub install) both work without the Store. The manual method downloads the App Installer’s dependencies, msixbundle, and license directly from the winget-cli GitHub releases and registers them with PowerShell.
Why does my browser warn that the App Installer could harm my device?
That is a false-positive download warning, not a real threat. The msixbundle comes straight from Microsoft’s official winget-cli repository on GitHub, so it is safe to keep and install.
![How to Install Windows 7 in VMware Workstation Player [Step-by-Step Guide]](https://memstechtips.com/wp-content/uploads/2024/04/How-to-Install-Windows-7-in-VMware-Workstation-17-Tutorial-768x432.jpg "How to Install Windows 7 in VMware Workstation (Step-by-Step) 2")