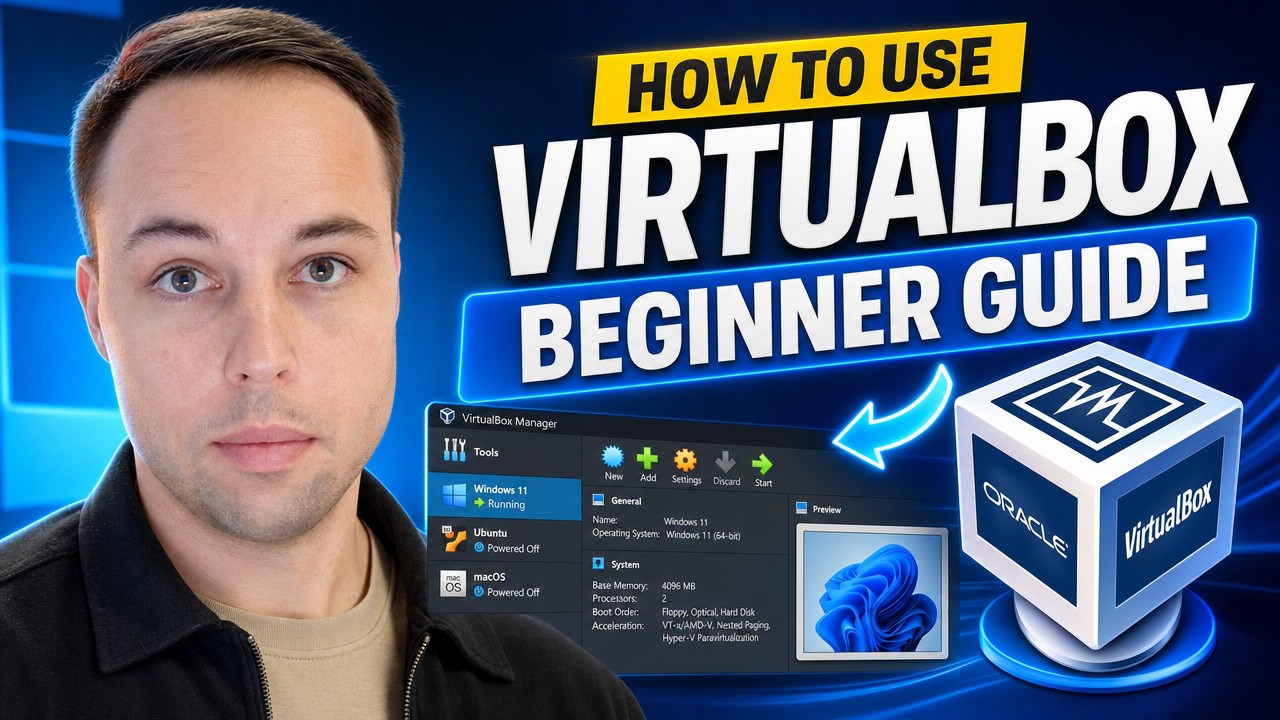
To use VirtualBox properly you only need to know where four things live: the machine settings, the Devices menu, the View menu and snapshots. Give a Windows 11 machine at least 4 GB of RAM and 2 CPU cores, drag the video memory to maximum, install the Guest Additions inside the machine, and then move files in and out through Devices > Shared Clipboard, Devices > Shared Folders and Devices > USB.
Applies to: VirtualBox 7.2 on Windows 10 (22H2) and Windows 11 (24H2, 25H2), with Windows 11 and Ubuntu guests | Last updated: September 16, 2026
Key Takeaways
- The host key is the right Ctrl key, not the left one. Right Ctrl + F toggles full screen, right Ctrl + C is scaled mode, and right Ctrl + Delete sends Ctrl + Alt + Delete into the machine.
- The Guest Additions install inside the virtual machine and give you full screen, the shared clipboard, drag and drop and shared folders. The Extension Pack installs into VirtualBox on your real PC and is no longer needed for USB 3.
- Shared folders are under Devices > Shared Folders. Tick Auto-mount and Make Permanent. In a Linux guest, add your user to the
vboxsfgroup or the folder stays locked. - NAT suits most machines. Bridged Adapter gives the machine its own IP address on your network. Port forwarding on the NAT adapter opens a single guest port to your PC.
- A green turtle icon in the status bar means VirtualBox is running on top of Hyper-V and everything will be slow. Turn off Hyper-V, Virtual Machine Platform, Windows Hypervisor Platform and Memory integrity, and the turtle is replaced by a blue chip icon.
Quick Steps
- Settings > System: set the memory and CPU cores inside the green part of the slider. 4 GB and 2 cores is the sensible minimum for Windows 11.
- Settings > Display: video memory to maximum. VBoxSVGA for Windows guests, VMSVGA for Linux guests.
- Start the machine, then Devices > Insert Guest Additions CD image, run the installer inside the machine and restart it.
- Devices > Shared Clipboard > Bidirectional, and the same under Devices > Drag and Drop.
- Devices > Shared Folders > Shared Folders Settings to share a folder from your PC. Tick Auto-mount and Make Permanent.
- Settings > USB: pick the USB 3 controller. With the machine running, attach a plugged-in drive from Devices > USB.
- Take a snapshot from the machine menu > Snapshots > Take before you test anything.
- If the status bar shows a green turtle, turn off Hyper-V and Memory integrity on your real PC.
This guide picks up where the install guide ends. If you do not have a machine yet, start with how to install Windows 11 in a virtual machine, or with how to download and install VirtualBox if you are starting from nothing.
The VirtualBox Settings That Actually Matter
Most of the problems people run into with VirtualBox come from three settings. Select the machine in VirtualBox and click Settings, then work through System and Display before you start it.
Under System you set the memory and the processors. Whatever you give the machine here, it borrows from your real PC while it is running. Both sliders have a green zone that turns orange and then red, and you want to stay inside the green part. My Windows 11 machine runs on 8 GB and 4 cores. For Windows 11, 4 GB and 2 cores is the least I would give it.
Under Display, drag the video memory all the way to the maximum. This one setting fixes most picture problems. The graphics controller below it should be VBoxSVGA for a Windows guest, which is the default for anything from Windows 7 up, and VMSVGA for a Linux guest. If a machine ever starts to a black screen, this is the setting to come back to.
The scale factor is on the same page. If the machine looks tiny on a high resolution monitor, push it up to 150 or even 200 percent.
The Host Key: How to Get Your Mouse and Keyboard Back
When you click inside a running machine it takes over your keyboard and mouse. The key that gives them back is what VirtualBox calls the host key, and by default it is the right Ctrl key. VirtualBox shows you which key it is in the bottom right corner of the machine window, and you can change it under File > Preferences > Input.
- Right Ctrl + F goes into full screen and back out again.
- Right Ctrl + C switches to scaled mode.
- Right Ctrl + Delete sends Ctrl + Alt + Delete to the machine. Pressing it on your keyboard normally goes to your real PC instead. You can also find it under Input > Keyboard.
Seamless mode is worth a look too. The machine’s windows sit on your desktop like normal apps, with no machine window around them. All of the view modes live in the View menu.
Tip: If the machine still will not fill the screen properly after the Guest Additions are installed and the machine has restarted, go to View > Virtual Screen and pick the resolution you want from there. That is what fixed it on my machine.
Guest Additions vs the Extension Pack
These two add-ons have confusing names and people mix them up constantly. Most of what follows in this guide needs one or the other, so it is worth being clear about which is which.
The Guest Additions get installed inside the virtual machine. They are the drivers for the virtual machine, and they are what give you a proper full screen picture, the shared clipboard, drag and drop and shared folders. If any of those are greyed out, it is because the Guest Additions are not installed yet. Start the machine, click Devices > Insert Guest Additions CD image, run the installer from that CD inside the machine, and restart it. The Guest Additions chapter of the VirtualBox manual covers the details.
The Extension Pack gets installed into VirtualBox itself, on your real PC. For years every guide told you to install it for USB 2 and USB 3 support, and I did the same. In the current version that is built in, and the USB 3 controller is there without it. What the Extension Pack adds today is remote desktop into the machine, host webcam passthrough, disk encryption and network boot, so most people do not need it at all. If you do want it, it is on the official VirtualBox downloads page and it is free for personal and educational use.
How to Get Files In and Out of a Virtual Machine
There are three ways to move things between your PC and a virtual machine, and all three are in the Devices menu of the running machine. All of them need the Guest Additions installed first.
Shared clipboard and drag and drop
With the machine running, go to Devices > Shared Clipboard and set it to Bidirectional, then do the same under Devices > Drag and Drop. Copy text on your real PC and it pastes inside the machine, and a file dragged from your desktop onto the machine’s desktop copies across. There is nothing else to set up.
Shared folders
For anything bigger, or a folder you want both machines to see all the time, use a shared folder. Go to Devices > Shared Folders > Shared Folders Settings and click the add button on the right.
- Folder Path is the folder on your real PC you want to share. The name fills in from the folder.
- Mount point lets you force a specific drive letter in a Windows guest.
- Auto-mount makes it appear every time the machine starts.
- Make Permanent keeps it in the machine’s settings instead of only for this session.
- Read-only lets the machine read the folder without changing anything in it.
Click OK and the folder shows up in File Explorer inside the machine. Anything you drop in there appears on both sides straight away.
USB drives
Shut the machine down first, go to Settings > USB and pick the USB 3 controller. The working with VMs chapter of the manual covers the USB, snapshot and clone settings in full. VirtualBox’s own advice is to use the older controllers only if the guest cannot handle USB 3, and USB 1 is painfully slow for a flash drive anyway.
Now start the machine, plug the USB stick into your real PC, and go to Devices > USB. Every USB device on your PC is listed there. Click the flash drive and it disconnects from your real PC and appears inside the machine. That is the part people miss: it is one or the other. While the drive is attached to the machine, Windows on your real PC cannot see it, and the moment you untick it there, it comes back.
If you want the same stick to attach itself every time you plug it in, plug it in and then use Settings > USB > add filter. VirtualBox fills in the device details for you.
VirtualBox Networking Modes Explained
Networking confuses people more than anything else in VirtualBox, and it comes down to one drop-down. Go to Settings > Network and look at Attached to. The full detail is in the networking chapter of the VirtualBox manual, but here is what each mode means in practice.
- NAT is the default and is right for most machines. The machine reaches the internet through your PC’s connection, but nothing on your network can see the machine and the machine cannot see your other devices. It is hiding behind your PC.
- Bridged Adapter makes the machine a proper member of your network. It gets its own IP address from your router, like a real computer plugged in next to yours, so your other devices can reach it. This is the one for running a server in the machine or testing between two PCs.
- Host-only Adapter is the opposite. The machine can talk to your real PC and nothing else, with no internet at all.
- NAT Network is NAT for several machines at once. They can see each other and still get out to the internet.
- Internal Network is machines talking to each other and nothing else.
Port forwarding on NAT
Because a NAT machine is hidden, nothing can connect into it. If you are running something in the machine, a web server for example, and you want to open it from your real PC, expand Advanced on the NAT adapter and click Port Forwarding. Add a rule that sends host port 8000 to guest port 80, and now localhost:8000 on your real PC lands inside the machine.
There is also a Cable Connected checkbox in those advanced settings. Untick it and the machine is offline, exactly as if you pulled the network cable out. It is the quickest way to cut a machine off from everything before you test something you do not trust.
How to Use Snapshots Properly
A snapshot is a save state of the entire virtual machine, exactly as it is at that moment. It is the one feature I think every VirtualBox user should know, because it means you never have to reinstall the operating system in that machine again.
In the VirtualBox window, select the machine, click the menu next to it, go to Snapshots and click Take. Give it a name that tells you what state the machine is in. I call mine “clean install”, because a name like “snapshot 1” tells you nothing three months later.
Then go and do whatever you want to the machine. Install a program, change settings, break something. To roll back, power the machine off, come back to Snapshots, select the snapshot and click Restore. VirtualBox offers to save the current state as another snapshot first, which is handy if you might want to come back to it. Start the machine again and it is exactly as it was.
You can keep more than one snapshot, and they branch. The thing to watch is disk space, because each snapshot is a file that records the changes since the one before it, and those files grow as you use the machine. Do not leave twenty of them lying around. When you are finished with one, select it and click Delete. That merges its changes down into the machine, so nothing is lost. It only tidies up.
How to Clone, Move or Remove a Virtual Machine
Cloning gives you a second copy of a machine without installing anything again. Right-click the machine, click Clone and give it a name. The MAC address policy drop-down defaults to generating new MAC addresses for all network adapters, which is what you want if both machines will ever be on your network at the same time, so leave it alone.
Then you choose the clone type. A full clone is a complete independent copy. It takes the full disk space, and you can delete the original afterwards. A linked clone only stores the differences from the original, so it is tiny and near instant, but the original has to stay where it is. For a quick throwaway test machine I use a linked clone, and for one I plan to keep, a full clone.
To move a machine to a different computer, use File > Export Appliance. Pick the machine, choose where to save it, and VirtualBox packs the whole thing into one OVA file. Copy that to the other PC and use File > Import Appliance there, and the machine comes up exactly as it was. To move it to another drive on the same PC, right-click the machine and click Move, and let VirtualBox move the files. Do not drag the folder around yourself.
When you are finished with a machine, right-click it and click Remove. Read this dialog before you click. Remove Only takes the machine out of the list and leaves the files on your drive, and Delete all files is the one that actually gives you the disk space back.
Using VirtualBox With a Linux Guest
Almost everything above is identical for a Linux machine. The Guest Additions are the part that works differently, because on Linux they compile a driver for your running kernel instead of installing a ready-made one.
I use Ubuntu Desktop here. Install the build tools first. Open a terminal and run this line:
sudo apt install build-essential dkms linux-headers-$(uname -r)Then click Devices > Insert Guest Additions CD image. The disc appears in the file manager, so open it, run the installer, let it build the drivers and restart the machine.
A shared folder shows up in a Linux guest as a folder with sf_ in front of the name, and by default you get “permission denied” when you open it. VirtualBox only lets members of a group called vboxsf into it, so add your user to that group, then log out and back in:
sudo usermod -aG vboxsf $USERNote: Type
$USERexactly as it is written. It is a variable, and Linux fills in your own username. If the group still is not applied after logging out and back in, restart the machine, because a logout does not always end every part of the desktop session.
Two things I hit on a current Ubuntu machine that are worth knowing. Leave the graphics controller on VMSVGA for Ubuntu, even if the machine prints an error at boot about running on an unsupported hypervisor. That message comes from Ubuntu’s graphics driver, which checks whether it is running on VMware and complains when it is not, and the machine carries on booting normally. On the current Ubuntu desktop, VMSVGA is also the only controller that resizes with the window after the Guest Additions are installed.
The other one: drag and drop did not work on my Ubuntu machine, although the shared clipboard did. If you need to move files, use a shared folder instead. The clipboard, USB, networking and snapshots all behave exactly the same as they do on a Windows guest.
Why VirtualBox Is So Slow on Windows 11 (the Turtle Icon)
Look at the status bar at the bottom of the running machine. If there is a small green turtle icon there, that is your answer. The turtle means VirtualBox could not get direct access to your CPU’s virtualization, because Windows has already taken it, so VirtualBox falls back to a slower way of running the machine. When VirtualBox does have direct access, that same spot shows a blue chip icon with a V on it instead.
On Windows 11 the culprit is Hyper-V and the features that run on top of it. VirtualBox’s own troubleshooting page says to always disable Hyper-V when running VirtualBox, and Microsoft’s page on the same conflict says it plainly: only one piece of software at a time can use the virtualization hardware, and this is by design.
Here is how to give it back to VirtualBox:
- Press the Windows key, type Turn Windows features on or off and open it.
- Untick Hyper-V, Virtual Machine Platform and Windows Hypervisor Platform, then click OK.
- Open Windows Security > Device security > Core isolation and switch Memory integrity off. Memory integrity runs on Hyper-V too, even after Hyper-V itself is off, which is why both VirtualBox and Microsoft say it has to go.
- Restart your PC and start the machine again. The turtle should be gone, and you will feel the difference.
Two trade-offs to be aware of before you do this. Memory integrity is a real security feature that protects the core of Windows from bad drivers, and Microsoft turns it on for a reason, so you are choosing speed in your virtual machines over that layer of protection. And if you use WSL 2, it runs on the Virtual Machine Platform, so it stops working while that feature is off. It really is one or the other.
If VirtualBox complains that virtualization is not available at all, the problem is further down. That is a BIOS setting, and I have a separate guide on how to enable virtualization on Windows 10 and 11 for Intel and AMD.
Memory Integrity Will Not Stay Off? Use Microsoft’s Readiness Tool
On some PCs the Memory integrity toggle refuses to stick. You switch it off, restart, and it is on again. This happened on my own PC, and turning off Windows Security made no difference at all, because memory integrity is not enforced by the Windows Security app. It is a setting Windows reads at boot, before anything in the desktop is running.
The fix is Microsoft’s own Device Guard and Credential Guard hardware readiness tool, which the VirtualBox manual points to for exactly this problem. It clears the Device Guard settings, turns off the Hyper-V hypervisor Windows feature, and stages a one-time boot screen that removes the firmware lock keeping the feature alive. That is the part the Windows Security toggle cannot do on its own.
Warning: The VirtualBox manual puts it well: “Disabling Device Guard and Credential Guard features impacts on the overall security of the host. Take this into account before deciding to disable them.” Windows Security will also show a warning while memory integrity is off. Everything here is reversible, and the last step in this section puts it all back.
Step 1: Download and extract the tool
The download is a 31.7 KB ZIP file called dgreadiness_v3.6.zip. Open PowerShell (no admin rights needed for this part) and paste this, which downloads it from Microsoft and extracts it to C:\DG so the folder is easy to reach later:
New-Item -ItemType Directory -Force -Path C:\DG | Out-Null
Invoke-WebRequest -Uri "https://download.microsoft.com/download/b/d/8/bd821b1f-05f2-4a7e-aa03-df6c4f687b07/dgreadiness_v3.6.zip" -OutFile C:\DG\dgreadiness_v3.6.zip
Expand-Archive -Path C:\DG\dgreadiness_v3.6.zip -DestinationPath C:\DG -Force
If you would rather download it yourself from the Microsoft Download Center page, save it and then run this single line instead, which extracts it from your Downloads folder to the same place:
Expand-Archive -Path "$env:USERPROFILE\Downloads\dgreadiness_v3.6.zip" -DestinationPath C:\DG -ForceEither way you end up with the script at C:\DG\dgreadiness_v3.6\DG_Readiness_Tool_v3.6.ps1. Microsoft’s own readme calls the file DG_Readiness.ps1, which is not the name that is actually in the ZIP, so use the full name above.
Step 2: Run it as administrator
Press the Windows key, type PowerShell, right-click Windows PowerShell and choose Run as administrator. The script checks for admin rights and exits without doing anything if it does not have them. Then paste these four lines:
cd C:\DG\dgreadiness_v3.6
Set-ExecutionPolicy -Scope Process -ExecutionPolicy Bypass -Force
Unblock-File .\DG_Readiness_Tool_v3.6.ps1
.\DG_Readiness_Tool_v3.6.ps1 -Disable -AutoReboot
The execution policy line only applies to that PowerShell window, so nothing is changed permanently. Unblock-File clears the “downloaded from the internet” flag that otherwise blocks the script. -AutoReboot restarts the PC for you, and the script tells you it will restart in 30 seconds. Save your work before you run it.
Step 3: Confirm the two screens during restart
This is the part nobody warns you about, and it is where the whole thing works or silently does nothing. After the restart, before Windows loads, you get a plain text screen asking you to confirm that you want to turn a security feature off. On my PC there were two of them, one for Credential Guard and one for Device Guard, and each one needed F3 and then Enter.
Microsoft documents that a prompt appears and that you have to press a function key to accept the change, but does not name the key, so read what is on your screen. Do not walk away during the restart. The prompt times out, and if it is not confirmed, the change is cancelled and nothing has been turned off. Run the script again if that happens.
Step 4: Turn Memory integrity off and check it stays off
Back in Windows, go to Windows Security > Device security > Core isolation and switch Memory integrity off, then restart your PC one more time. This time the toggle stays off. To check the result without opening any windows, run this in PowerShell:
Get-CimInstance -ClassName Win32_DeviceGuard -Namespace root\Microsoft\Windows\DeviceGuard | Select-Object VirtualizationBasedSecurityStatus, SecurityServicesRunningVirtualizationBasedSecurityStatus of 0 means virtualization-based security is off, which is what you want. A 2 means it is still running. In SecurityServicesRunning, a 1 is Credential Guard and a 2 is memory integrity, and an empty result means neither is running. The tool also writes a log to C:\DGLogs if you want to see what it did.
Start your virtual machine and the turtle should be gone, replaced by the blue chip icon.
How to put it all back
When you want the protection back, run the same script with -Enable from an administrator PowerShell window:
cd C:\DG\dgreadiness_v3.6
.\DG_Readiness_Tool_v3.6.ps1 -Enable -AutoReboot
You can also switch Memory integrity back on in Windows Security. Because the tool removed the Hyper-V hypervisor Windows feature, you may need to tick Hyper-V, Virtual Machine Platform and Windows Hypervisor Platform again under “Turn Windows features on or off” if you use Hyper-V, WSL 2 or Windows Sandbox.
How to Test Risky Software Safely in a Virtual Machine
Testing software you do not trust is the reason a lot of people want a virtual machine in the first place. Three things turn a normal machine into a reasonably sealed one, and they take about a minute.
- Take a snapshot first, so you can roll straight back when you are done.
- Untick Cable Connected in the network settings, so the machine cannot reach anything.
- Switch off shared folders and the shared clipboard for that session. Those are the bridges between the two machines, and they are the route anything in there would take to your real PC.
Do those three and the machine is very well isolated. It is not perfect, and there have been rare bugs over the years that let something escape a virtual machine, but with the network cut and the bridges closed you are about as safe as you can get. When you are finished, restore the snapshot and whatever you installed is gone.
A virtual machine is also the right place to try tweaks and tools before they touch your main install, including my own Winhance. Snapshot first, try it, roll back if you do not like the result.
Frequently Asked Questions
Do I need the VirtualBox Extension Pack for USB 3?
No. In the current version of VirtualBox the USB 1, 2 and 3 controllers are in the base package, and the USB 3 controller is available under Settings > USB without installing anything extra. The Extension Pack adds remote desktop into the machine, host webcam passthrough, disk encryption and network boot, and it is free for personal and educational use.
Why is my virtual machine so slow on Windows 11?
Look for a green turtle icon in the status bar of the running machine. It means Windows has taken the CPU’s virtualization for Hyper-V, so VirtualBox is running on top of Hyper-V instead of directly on the hardware. Turn off Hyper-V, Virtual Machine Platform, Windows Hypervisor Platform and Memory integrity, restart, and the turtle is replaced by a blue chip icon.
Is it safe to turn Memory integrity off?
Memory integrity protects the Windows kernel from malicious or vulnerable drivers, so turning it off does lower your protection, and Windows Security will warn you while it is off. It is a trade-off between that protection and usable speed in VirtualBox. It is fully reversible, either through the Windows Security toggle or by running the readiness tool with -Enable.
Can I copy a virtual machine to another PC?
Yes. Use File > Export Appliance to pack the machine into a single OVA file, copy that file to the other computer, and use File > Import Appliance there. For a second copy on the same PC, right-click the machine and use Clone instead, and let VirtualBox generate new MAC addresses.
Does drag and drop work with a Linux guest?
Not on the Ubuntu machine I tested it on, even with the Guest Additions installed and drag and drop set to Bidirectional. The shared clipboard worked normally, so copy and paste is fine, and a shared folder is the reliable way to move files in and out of a Linux guest.