To uninstall a Windows update that broke your PC, open Settings > Windows Update > Update history > Uninstall updates, click Uninstall next to the update from the day things went wrong, and restart. If Windows will not boot, get into the recovery environment and use Troubleshoot > Advanced options > Uninstall Updates instead. Then pause updates from Settings > Windows Update so the same update does not come straight back.
Applies to: Windows 11 (23H2, 24H2, 25H2) | Last updated: August 28, 2026
Key Takeaways
- Update history shows every update that went onto the PC, grouped by type with a date next to each one. The one that broke things is almost always a quality update, the monthly patch with a KB number, from the day the trouble started.
- The Uninstall updates list is shorter than Update history because, in Microsoft’s exact words, “Some updates cannot be uninstalled.” The servicing stack update bundled into the monthly patch can never be removed once it is installed.
- If Windows will not boot, the recovery environment starts on its own after two failed starts in a row. Troubleshoot > Advanced options > Uninstall Updates removes the latest quality or feature update without ever reaching the desktop. A BitLocker-encrypted drive asks for the recovery key first.
- Uninstalling is only half the job. Windows installs the same update again on the next restart unless you pause updates. Settings > Windows Update > Pause updates > Pick a date holds it for up to 35 days, and that stops the download, not just the restart.
- The old
wusa /uninstall /kb:command no longer works on the monthly cumulative update, because Microsoft now ships it in a combined package with the servicing stack update. Settings and the recovery environment are the routes that work.
Quick Steps
- Right-click Start > Settings > Windows Update > Update history, and find the update installed on the day things went wrong.
- Scroll to Related settings > Uninstall updates, click Uninstall next to that update, confirm, and restart.
- If a whole new version of Windows caused it, use Settings > System > Recovery > Go back instead (about 10 days to do this).
- If Windows will not boot, interrupt the boot twice (hold the power button at the logo) or hold Shift while clicking Restart on the sign-in screen to reach the recovery environment.
- In recovery, go to Troubleshoot > Advanced options > Uninstall Updates and pick the quality or feature update option that matches what just installed.
- Back on the desktop, open Settings > Windows Update > Pause updates > Pick a date, and push it out up to 35 days.
- If the PC still feels off, open Terminal as administrator and run
DISM /Online /Cleanup-Image /RestoreHealth, thensfc /scannow, then restart.
In This Guide
- Uninstall the update from Settings: finding the right one, and why some are missing from the list.
- If it was a feature update: the Go back button and its 10-day window.
- When Windows will not boot: getting into recovery and uninstalling from there.
- Stop the update coming straight back: pause updates, and the Winhance option that keeps you a week behind.
- Clear the Windows Update cache: for when Windows Update itself is stuck.
- Still not right after that: DISM, then SFC, in that order.
Uninstall the Update From Settings (If You Can Still Get In)
If your PC stopped working properly right after a Windows update, and to be honest that happens a lot these days, the quickest way out is usually to remove that one update. Something keeps crashing, a device stopped working, or the machine is just not behaving the way it did yesterday. Removing the update from the day it started is the first thing I would try. For a recent example of how bad these can get, see my write-up on the January 2026 update that broke a lot of PCs.
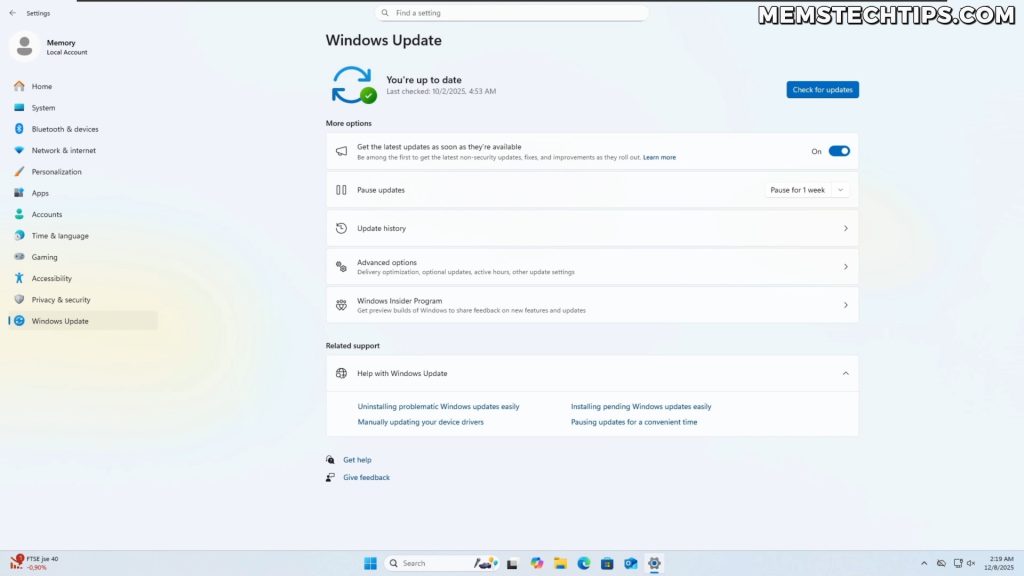
Right-click the Start button, open Settings, and click Windows Update at the bottom of the left-hand column. On that page you will find Update history. Microsoft’s own guide to uninstalling a Windows update follows exactly this path.
Find the Update That Broke Things
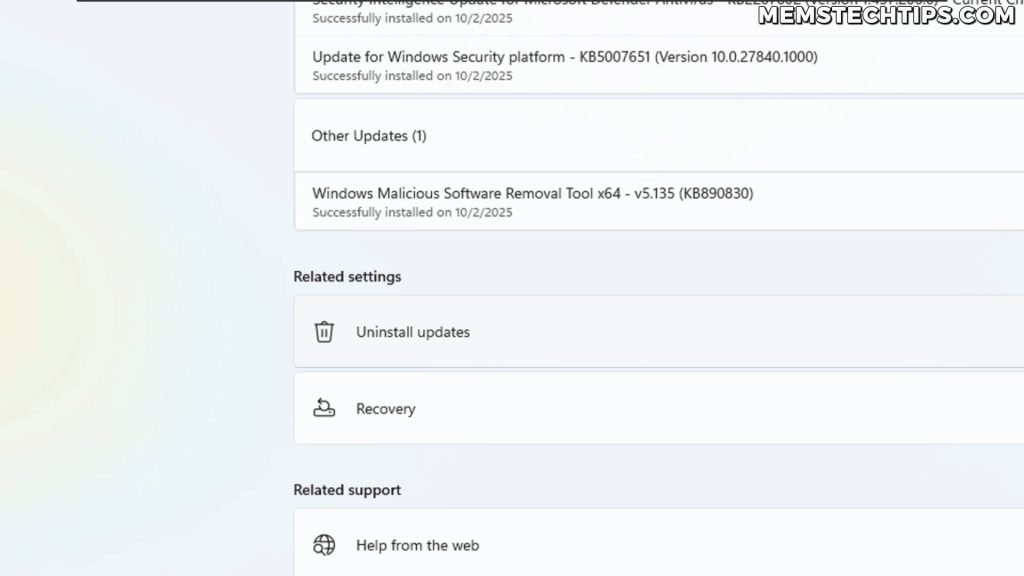
Update history is every update that has gone onto this PC, grouped by type, with the date next to each one. Have a look at what went on the day things went wrong. It is usually one of the quality updates, the monthly ones with a KB number, rather than a driver or a definition update. That KB number is the thing to remember.
Now scroll to the bottom of the page. Under Related settings there is Uninstall updates. Click it and you get the list of updates you can actually remove.
Why the List Is Shorter Than Your History
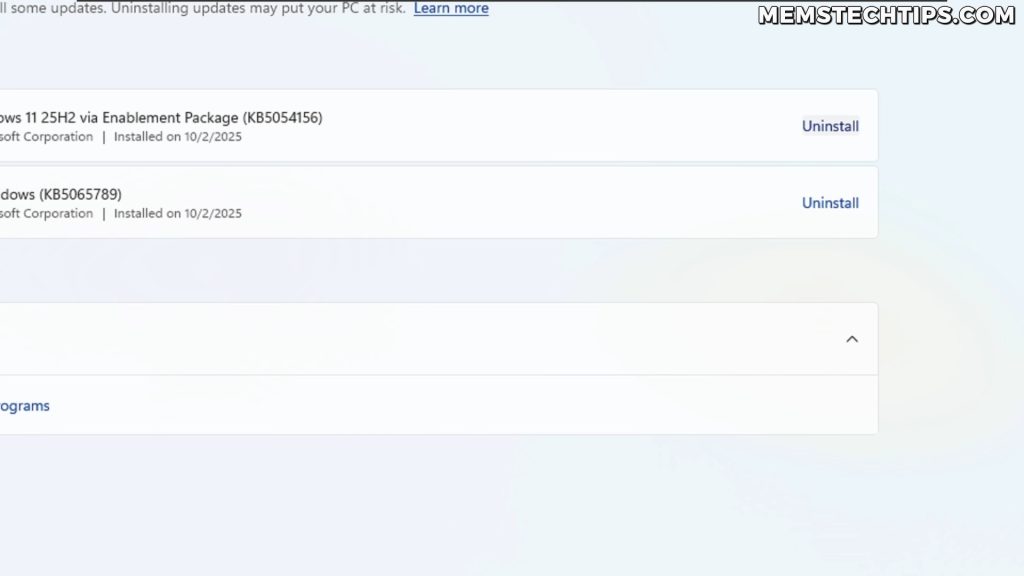
You will notice straight away that this list is shorter than Update history. That is because, in Microsoft’s exact wording, “Some updates cannot be uninstalled.” The clearest example is the servicing stack update. It is bundled in with the monthly patch, and Microsoft’s own release notes for the monthly update say you cannot remove it from the system once it is installed.
So if the update you are after is not in this list, that is most probably why. It is not a bug and there is no trick to force it. Microsoft’s Windows Update FAQ says the same thing in one line: not all updates can be removed.
If it is in the list, click Uninstall next to it, confirm, and then restart. The removal only finishes on that restart, so do not skip it. If you have more than one to remove, choose Restart later after each one and restart once at the end.
What About the Command Line?
An older version of this guide recommended wusa /uninstall /kb:NNNNNNN as a fallback. That no longer works on the monthly cumulative update. Microsoft now ships the cumulative update and the servicing stack update together in one combined package, and its release notes state that running wusa.exe with the /uninstall switch on that combined package will not work.
The command-line route Microsoft documents instead is to list the installed packages with DISM and remove the one you want by its package name using the /Remove-Package option:
DISM /Online /Get-PackagesI have not filmed that route, and for almost everyone the Settings page and the recovery environment below cover it. Treat the DISM route as the power-user option for when the update is genuinely not in the list and you know exactly which package you are removing.
If It Was a Feature Update, Use Go Back
If what broke things was a feature update, meaning a whole new version of Windows rather than a monthly patch, that is a different button. Go to Settings > System > Recovery and look for Go back. That rolls the PC back to the version of Windows it was on before the upgrade.
Microsoft’s Go back documentation says that in most cases you have 10 days to do this. After that, Windows removes the files it kept for the rollback. So if the button is greyed out or gone completely, the window has most probably closed, and uninstalling the update is no longer an option on that machine.
When Windows Will Not Boot: Uninstall From the Recovery Environment
This is the one that worries people. Windows will not boot at all, or it keeps restarting in a loop, and none of the Settings steps above are reachable. The good news is that Windows takes you into the recovery environment by itself after two failed starts in a row, which Microsoft confirms in its Windows RE technical reference. So if you are in a boot loop, you are probably already there.
If you are not, you can force it. Microsoft’s own advice in its recovery environment guide is to interrupt the boot two times in a row. The moment you see the Windows logo, hold the power button until the machine is off. Do that twice, and the next start should land you in recovery.
If you can get as far as the sign-in screen, there is an easier way in. Hold the Shift key while you click Power, then Restart. That drops you into the same recovery environment.
Uninstall Updates From Recovery
Once you are in, go to Troubleshoot > Advanced options > Uninstall Updates. You get two choices. Uninstall latest quality update removes your most recent monthly patch. The tile next to it does the same for a feature update. Pick the one that matches what just installed, and Windows pulls it off without ever getting to the desktop.
BitLocker: If your drive is encrypted, the recovery environment asks for your BitLocker recovery key before it lets you touch anything. On a lot of Windows 11 PCs that encryption was switched on without anyone asking, so if you have never seen a recovery key, my guide on where your BitLocker recovery key is actually saved shows you where to look.
Quick Machine Recovery Might Already Be Working on It
There is something new under Settings > System > Recovery called Quick machine recovery. According to Microsoft’s Quick machine recovery documentation, it is available on Windows 11 24H2 build 26100.4700 or later, and it is on by default on Home, and on Pro PCs that are not managed by a company.
What it does is this. If your PC cannot boot, the recovery environment gets online, checks Windows Update for a fix, and applies it on its own. So on an up-to-date PC, that might already be busy before you even get to the Uninstall Updates tile. It is worth knowing it exists, because a machine that sits on the recovery screen for a while may be doing exactly what you were about to do by hand.
Stop the Same Update Coming Straight Back
This is the part most people miss, and it is the top complaint under every other video on this topic. You get the update uninstalled, you restart, and it comes straight back on the next check. Windows Update does not know that update broke your PC. It just sees a PC that is missing a patch.
So once you are back in, go to Settings > Windows Update. At the top there is Pause updates, and on current versions of Windows there is a Pick a date button next to it. You can push that out up to 35 days from today. Microsoft’s pause updates documentation confirms that updates which need a restart are not downloaded or installed until the pause ends. That stops the download, not just the restart, which is the whole point.
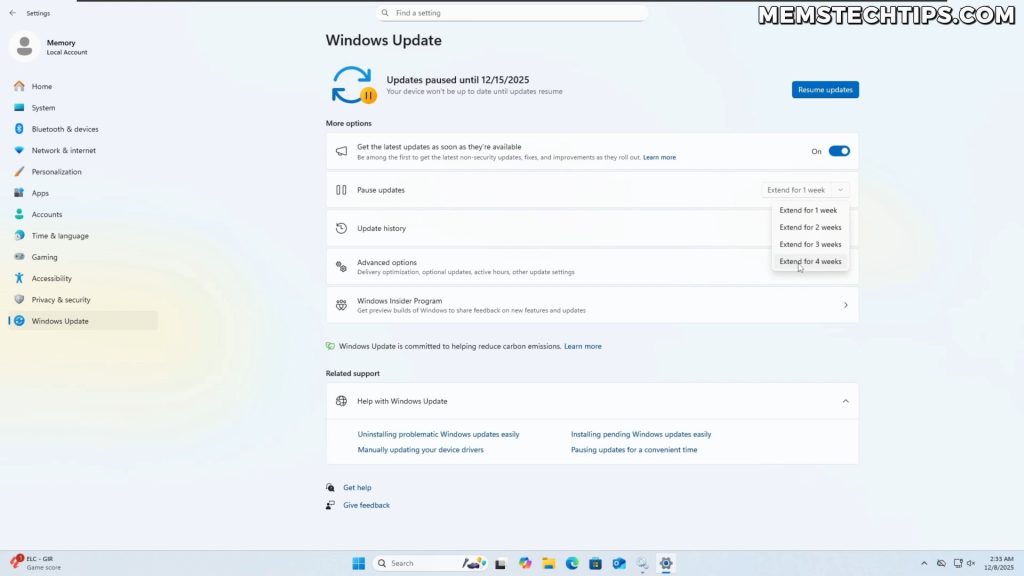
Thirty-five days is usually enough for Microsoft to fix whatever went wrong with the patch. If you want to hold it longer than that, I have a full guide on pausing Windows 11 updates for as long as you want, which covers the trick of renewing the pause before it expires.
Sit a Week Behind With Winhance
If you would rather never be first in line for a bad patch, Winhance, my free Windows enhancement utility, has a Windows Update Policy setting under Optimize > Windows Updates. The Security Updates Only option holds quality updates back for a week and feature updates for a year. A buggy update released by Microsoft on a Tuesday does not land on your PC the same day, and that gives Microsoft time to fix it before you ever see it.
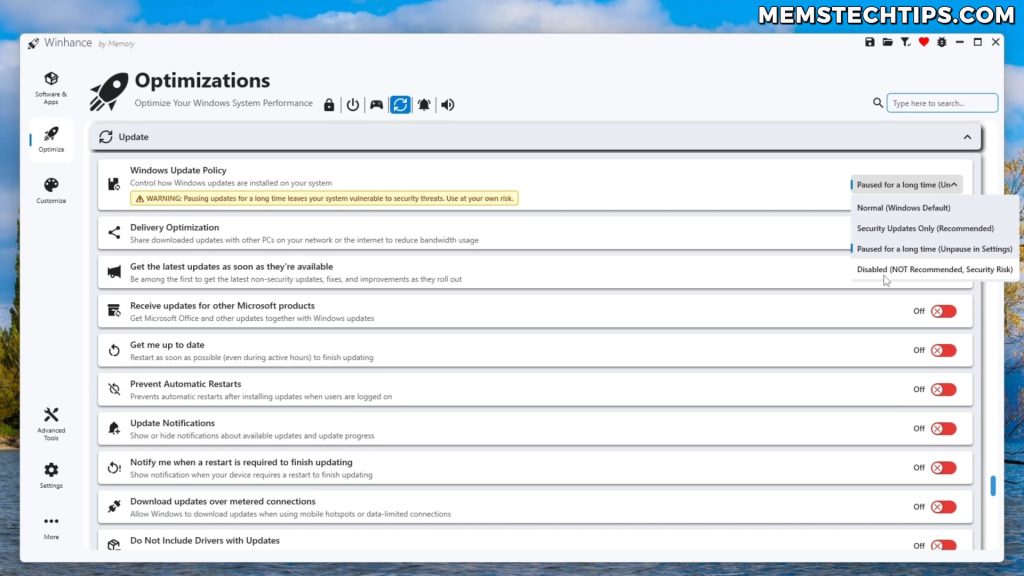
The same dropdown also has a long pause and a full disable option. I would leave those alone unless you have a specific reason. Security Updates Only is the one I recommend, because you still get every patch, just a week after everyone else has tested it for you.
Warning: Disabling Windows Update entirely means you stop receiving security patches. Use a pause or a deferral while you wait for Microsoft to fix a bad update, and let updates through again once the fix ships. If you want to lock a specific Windows version instead, that is a different job, covered in my guide on locking your Windows version with the registry.
Clear the Windows Update Cache (When Windows Update Itself Is Stuck)
An older version of this guide told you to delete the whole C:\Windows\SoftwareDistribution folder after every uninstall, on the theory that it stops the reinstall. It does not. Windows downloads the update again from Microsoft on the next check, cache or no cache. Pausing updates is what stops the reinstall. The cache reset is for a different problem: Windows Update itself is stuck, a download keeps failing, or an update keeps erroring out halfway through.
When that is your problem, the method is the one Microsoft documents: stop the update services, rename the download folders out of the way, and start the services again. Renaming rather than deleting means the originals are still there if you ever need them back. Right-click Start, open Terminal (Admin), and run these one block at a time.
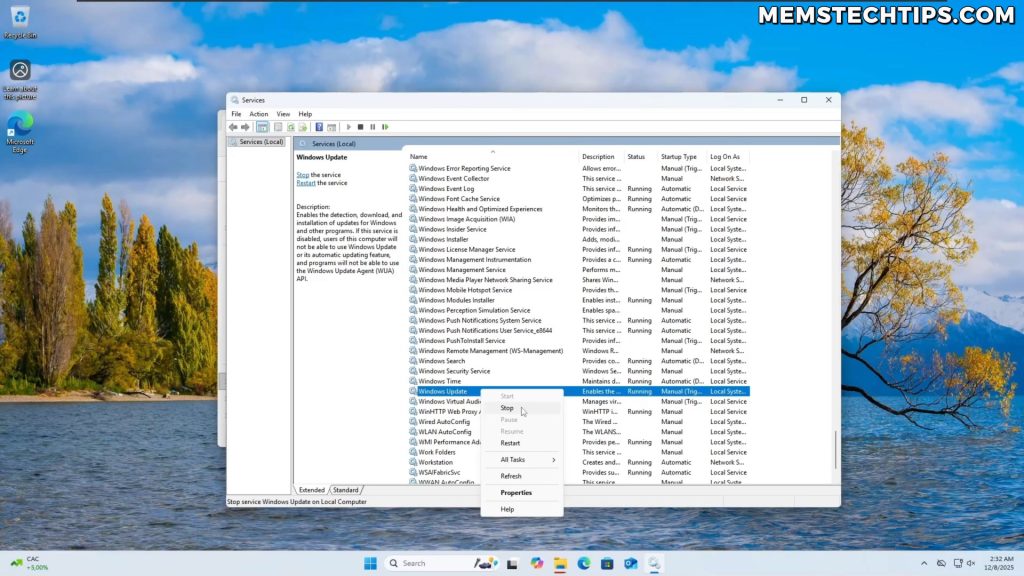
net stop bits
net stop wuauserv
net stop cryptsvc
ren C:\Windows\SoftwareDistribution\DataStore DataStore.bak
ren C:\Windows\SoftwareDistribution\Download Download.bak
ren C:\Windows\System32\catroot2 catroot2.baknet start bits
net start wuauserv
net start cryptsvcIf a rename comes back with access denied, one of the services is still running. Run the three stop commands again and check each reports success before you retry. You can do the same renames in File Explorer inside C:\Windows\SoftwareDistribution once the services are stopped, if you prefer clicking to typing.
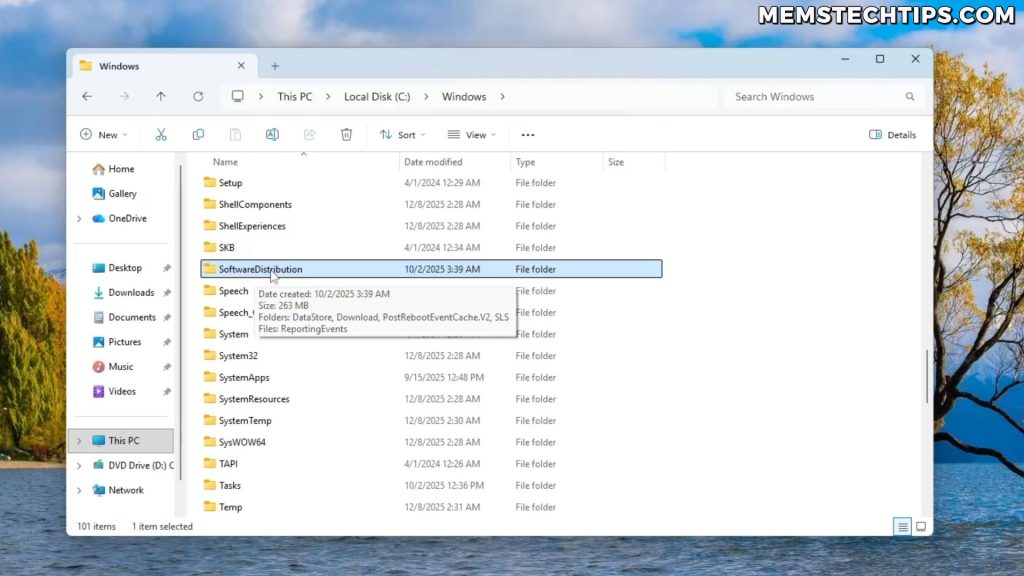
Expect the Update history list in Settings to start again from empty afterwards. The updates themselves stay installed, only the list is rebuilt. The full walkthrough of this reset, including the checks to do before it and the DISM and SFC repair after it, is in my guide on fixing Windows 11 update errors in the right order.
The Component Store Is a Different Folder
SoftwareDistribution is only the download cache. The installed update files live in the component store, C:\Windows\WinSxS, which also keeps older versions so that an update can be uninstalled later. If you want to free up the space those old versions take, this command cleans them out safely:
DISM /Online /Cleanup-Image /StartComponentCleanupDo not add /ResetBase while you are troubleshooting. That flag permanently removes the superseded versions, and once it has run, the updates currently installed can no longer be uninstalled through Settings. Use it only on a PC you are happy with. More space-saving options are in my guide on cleaning your C drive on Windows 10 and 11.
Still Not Right? DISM, Then SFC
If things are still a bit weird even after the update is gone, the update may have left damaged system files behind. Open Terminal as administrator and run these two commands, in this order, then restart:
DISM /Online /Cleanup-Image /RestoreHealth
sfc /scannow
The order matters. SFC repairs your system files from a local copy, and DISM is what repairs that copy. Microsoft’s System File Checker documentation says to run DISM before SFC for exactly that reason. Almost everyone runs them the other way round, which is why SFC so often reports files it could not fix. I go through both commands, what the results mean, and what to do when they fail, in my guide on running SFC and DISM in the right order.
Frequently Asked Questions
Why is the update I want to remove not in the Uninstall updates list?
Because some updates cannot be uninstalled, and Windows only lists the ones that can. The servicing stack update that ships inside the monthly patch is the main one; Microsoft states it cannot be removed once installed. If the update is missing from the list, the recovery environment’s Uninstall Updates tile is worth a try, but if it is a servicing stack update there is no route to remove it.
Why does the update come back after I uninstall it?
Windows Update sees a PC that is missing a patch and installs it again on the next check, often on the very next restart. Uninstalling does not tell Windows the update was bad. Pause updates from Settings > Windows Update > Pause updates > Pick a date, up to 35 days, and the update is not downloaded or installed until the pause ends.
Will uninstalling a Windows update delete my files?
No. Uninstalling a quality update or using Go back after a feature update removes the update’s changes to Windows, not your documents, photos or programs. The one thing to have ready is your BitLocker recovery key if your drive is encrypted, because the recovery environment asks for it before it lets you uninstall anything.
The Go back button is greyed out. What now?
Microsoft gives you about 10 days after a feature update to go back, and then it removes the files it kept for the rollback. Once the button is greyed out or gone, that window has closed. At that point the options are to uninstall the monthly quality updates that came with it, repair the system files with DISM and SFC, or wait for Microsoft’s fix.
Does this work on Windows 10?
The recovery environment route (Troubleshoot > Advanced options > Uninstall Updates), the DISM and SFC repair, and pausing updates all work the same way on Windows 10 22H2. The Settings pages are laid out differently, so the exact clicks to reach Update history are not the same, and Quick machine recovery is a Windows 11 24H2 feature that Windows 10 does not have.