Most Windows 10 users are being blocked from upgrading to Windows 11 by Microsoft’s artificial hardware requirements, even though their computers can actually run the operating system perfectly fine. If you’ve been frustrated by compatibility checks that prevent you from upgrading, there’s actually a simple solution that makes the process straightforward.
In this tutorial, I’ll show you exactly how to use Flyby 11 to bypass Microsoft’s hardware restrictions and upgrade your Windows 10 PC to Windows 11. More importantly, I’ll demonstrate the best method to keep all of your files, settings, and applications exactly as they are during the upgrade process.
Key Takeaways
- Flyby 11 bypasses artificial hardware requirements while honestly checking for real technical limitations like CPU instruction support
- Using Microsoft’s Media Creation Tool with recommended settings gives you the best chance of preserving all files, settings, and apps
- Failed upgrade attempts are usually caused by incompatible software, drivers, or system corruption and may require a clean installation approach
Requirements
Before starting this Windows 11 upgrade process, you’ll need:
- A Windows 10 computer that you want to upgrade
- Internet connection for downloading tools and ISO files
- At least 8GB of free disk space for the upgrade process
- Administrator privileges on your computer
- Time to complete the upgrade (typically 1-2 hours depending on your system)
Why Use Flyby 11 to Bypass Windows 11 Hardware Requirements?
Microsoft has implemented two different types of requirements for Windows 11 that many users don’t understand. There are artificial requirements like TPM 2.0 and Secure Boot that can be bypassed, and there are real hardware limitations like specific CPU instructions that cannot be bypassed.
Flyby 11 solves this confusion by bypassing Microsoft’s artificial hardware requirements while providing an honest assessment of your computer’s actual technical capabilities. This means you can upgrade to Windows 11 on compatible hardware that Microsoft’s compatibility checker incorrectly blocks.
Important Note: This tutorial is for educational purposes only. I’m not telling you that you must use Flyby 11 or that you must upgrade to Windows 11. I’m simply providing instructions and troubleshooting steps for those who choose to proceed.
Download and Install Flyby 11
The first step is getting the Flyby 11 tool from its official source on GitHub.
Getting Flyby 11 from GitHub
Navigate to the official Flyby 11 GitHub repository and scroll down until you find the releases section. Click on the latest release to access the download page.

On the release page, scroll down to find the Flyby 11 zip file and click on it to download. Once downloaded, open the zip file in your downloads folder and extract all the files to a convenient location.
Running Flyby 11
After extracting the files, open the Flyby 11 folder and run the Flyby 11 application. You might encounter a Windows SmartScreen prompt – simply click “More info” and then “Run anyway” to proceed.
Hardware Compatibility Check with Flyby 11
When Flyby 11 launches, it immediately performs a comprehensive Windows 11 compatibility check that’s much more informative than Microsoft’s official tool.
Understanding CPU Requirements
The compatibility check focuses on two critical CPU instruction sets: pop count and SSE 4.2 instructions. These are real hardware requirements that cannot be bypassed – if your CPU doesn’t support these instructions, you won’t be able to run Windows 11 24H2.

If you want to understand more about these hardware differences, I’ve created a detailed guide explaining Windows 11 24H2 hardware compatibility requirements that covers the distinction between artificial and real hardware limitations.
Key Point: Flyby 11 bypasses Microsoft’s artificial hardware requirements while providing honest information about actual technical requirements introduced in Windows 11 24H2.
Start the Windows 11 Upgrade Process
Once the compatibility check shows a high upgrade probability, you can begin the actual upgrade process.
Initiating the Upgrade
Click “Start Upgrade Now” to proceed to the next screen. Flyby 11 will prompt you to provide a Windows 11 ISO file that it can use for the upgrade process.

While the developer suggests downloading the ISO directly from Microsoft or using the Fido downloader, I’m going to show you a specific method that gives you the absolute best chance of preserving all your files, settings, and applications.
Download Windows 11 ISO with Media Creation Tool
The key to a successful upgrade that preserves everything is using the correct Windows 11 installation media. Here’s why the Media Creation Tool is crucial for this process.
Why Use Media Creation Tool Instead of Direct ISO Download
The Media Creation Tool allows you to use recommended options for your specific computer, ensuring the ISO file matches your current system’s language and region settings. This compatibility is essential for keeping all your files, settings, and apps during the upgrade.

Downloading and Running Media Creation Tool
Visit the official Windows 11 downloads page and scroll down to find the Media Creation Tool section. Click “Download Now” to get the Media Creation Tool.
After downloading, run the tool and accept the license terms. You’ll then see the language and edition selection screen.
Configure Media Creation Tool Settings
On the language and edition screen, you’ll see an option to “Use the recommended options for this PC.” This is exactly why we’re using the Media Creation Tool – leave this option checked as it ensures the ISO file will have the same settings as your current computer.

Click “Next” and then choose the “ISO file” option. Select a location to save the file (I recommend the desktop) and name it something recognizable like “Windows 11.” The tool will then download the appropriate ISO file for your system.
Mount ISO and Begin Installation
Once the Media Creation Tool finishes downloading the ISO file, you can feed it into Flyby 11 to start the actual upgrade process.
Adding the ISO to Flyby 11
Return to the Flyby 11 upgrade assistant window and drag the downloaded ISO file into the designated area. Flyby 11 will automatically mount the ISO file and run the setup with bypassed hardware requirements.

You’ll see a message confirming that “Windows 11 installation can now proceed” with instructions to follow the onscreen prompts in the setup window.
Windows 11 Setup Process
The setup window will appear (don’t worry if it mentions “Windows Server” – it will upgrade to the same edition you currently have). I typically configure the setup to not download updates during installation by clicking “Change how setup downloads updates” and selecting “Not right now.”
I also uncheck the box about helping to make installation better, then click “Next” to continue.
Tip: The setup will perform hardware compatibility checks, but because we’re using Flyby 11’s Windows Server setup method, it bypasses these restrictions automatically.
Keep Files, Settings and Apps During Upgrade
This is the most critical part of the entire process – the screen that determines whether you can preserve everything during the upgrade.
The Moment of Truth
After accepting the license terms, you’ll reach the screen asking what you want to keep during the upgrade. This is where using the Media Creation Tool with recommended settings pays off.

If the ISO file has the exact same language and region settings as your current PC, you’ll see the option to “Keep personal files, apps, and Windows settings.” This is exactly what you want to select to maintain everything from your Windows 10 installation.
Why Language and Region Settings Matter
If the ISO file doesn’t match your current system’s language and region settings, you’ll likely only see options to keep personal files or nothing at all. This is why the Media Creation Tool approach is so important – it ensures compatibility for preserving your complete system state.
Select the option to keep everything and click “Next.” The setup will perform final checks and then show you a summary of what will happen during the installation.
Complete Windows 11 Installation
Once you’re satisfied with the installation summary, click “Install” to begin the actual Windows 10 to Windows 11 upgrade process.
Post-Installation Steps
After the installation completes, your computer will boot directly into Windows 11 with all your files, settings, and applications exactly as they were in Windows 10.

The first thing you should do is check for Windows updates to ensure you have the latest security patches and drivers for optimal performance. Navigate to Settings > Windows Update and click “Check for updates.”
Troubleshooting Tip: If Windows updates aren’t working immediately after upgrade, pause updates for seven days, then resume them and check for updates again. This usually resolves any temporary update issues.
Troubleshooting Failed Upgrades
Sometimes users experience repeated failed upgrade attempts that result in the system rolling back to Windows 10. Here’s how to handle these situations.
Common Causes of Upgrade Failures
Failed upgrades typically occur due to:
- Incompatible software or drivers
- Failing hardware components
- File system corruption in the existing Windows installation
- Conflicting security software
Solutions for Persistent Upgrade Issues
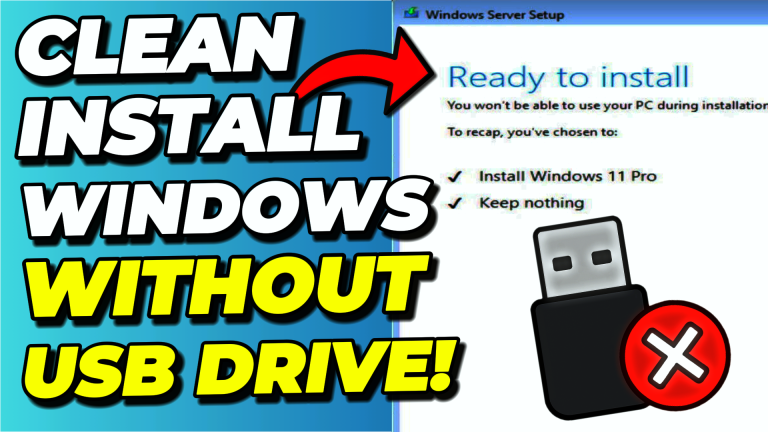
If you encounter repeated upgrade failures, I honestly recommend either selecting the “Keep nothing” option during the upgrade process or performing a complete clean installation of Windows 11.
If the hardware checks in Flyby 11 passed and showed a high upgrade probability, a clean installation will likely succeed. However, you’ll need to:
- Back up all important files to another drive first
- Reinstall all your software applications
- Reconfigure your system settings
While this requires more work, it ensures you’ll have a stable Windows 11 installation if that’s your goal.
Conclusion
Flyby 11 provides an excellent solution for bypassing Microsoft’s artificial hardware requirements while giving you honest information about your system’s actual compatibility with Windows 11. By using the Media Creation Tool with recommended settings, you maximize your chances of preserving all files, settings, and applications during the upgrade process.
Remember that this process works best on systems that meet the real hardware requirements but are blocked by Microsoft’s artificial restrictions. If you experience persistent upgrade failures, don’t hesitate to consider a clean installation approach for the most stable results.
Now that you have Windows 11 running, you might want to optimize your system further. Check out my Winhance Windows 11 enhancement utility to debloat and optimize your new Windows 11 installation while keeping it optimized over time.
Frequently Asked Questions (FAQ)
Is it safe to use Flyby 11 to bypass Windows 11 hardware requirements?
Flyby 11 is an open-source tool available on GitHub that bypasses Microsoft’s artificial hardware restrictions. It doesn’t modify core system files or compromise security features. However, like any system modification, use it at your own discretion and ensure you have backups of important data.
Will I lose my files and programs when using Flyby 11 to upgrade?
If you follow the method I outlined using the Media Creation Tool with recommended settings, you should be able to keep all your files, settings, and applications. The key is ensuring the ISO file matches your current system’s language and region settings.
What should I do if the upgrade fails repeatedly?
Persistent upgrade failures are usually caused by incompatible software, driver issues, or system corruption. In these cases, I recommend either choosing to keep nothing during the upgrade or performing a clean Windows 11 installation after backing up your important files.
Can older computers really run Windows 11 properly?
Many older computers can run Windows 11 well, but it depends on the specific hardware. Flyby 11 checks for real hardware requirements like CPU instruction support. If these checks pass with high probability, your computer should run Windows 11 without issues.
Do I need to worry about Windows updates after using Flyby 11?
No, Windows updates work normally after upgrading with Flyby 11. I recommend checking for updates immediately after installation to get the latest security patches and drivers. If updates don’t work initially, try pausing them for seven days and then resuming – this usually resolves any temporary issues.


